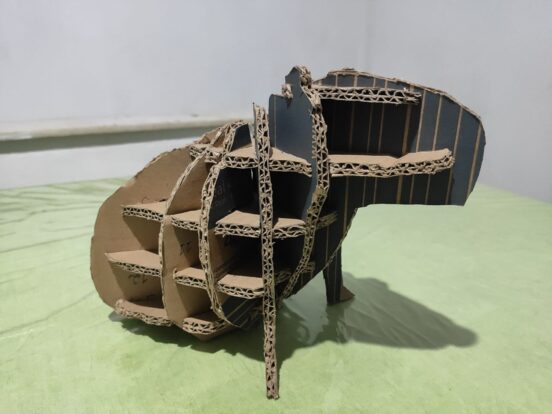
This post is the fruit of boredom due to the quarantine, some cardboard I had laying around, and a little bit of curiosity. If you want to build a cardboard capybara just like this one, you can download the instructions at the end of this article. If you want to get acquainted with the Slicer for Fusion360 software, or are just curious about how I projected the sculpture, I strongly suggest reading the whole text.
Getting to work
First of all, to make the project I needed to find a good 3D model of a capybara. It was not hard to find this low poly capybara model on Thingverse. Then I needed to download the software I would be using. Autodesk developed it with the intent of it being used in conjunction with Fusion360, but here I used the stand-alone version.
The Slicer for Fusion360 is a pretty straightforward piece of software. You first import the model and then inform the program about the manufacturing settings you are going to use. In this part, it was necessary to measure the thickness of the cardboard I had with some calipers. Then, you select the way you want the program to cut your model.
A piece of good advice is to use “Radial Slices” instead of the default “Interlocked Slices”, this way you get smaller pieces that more easily fit in the A4 paper size. Once you slice the model it is important to go through the “Modify Form”. Although not strictly necessary, it always yields better results to gently move the generated cuts a little bit in order to get the exact details of the original 3D model you want the final result to retain. Once the process is finished you only need to click “Get Plans” in order to obtain the coordinates of the cuts.
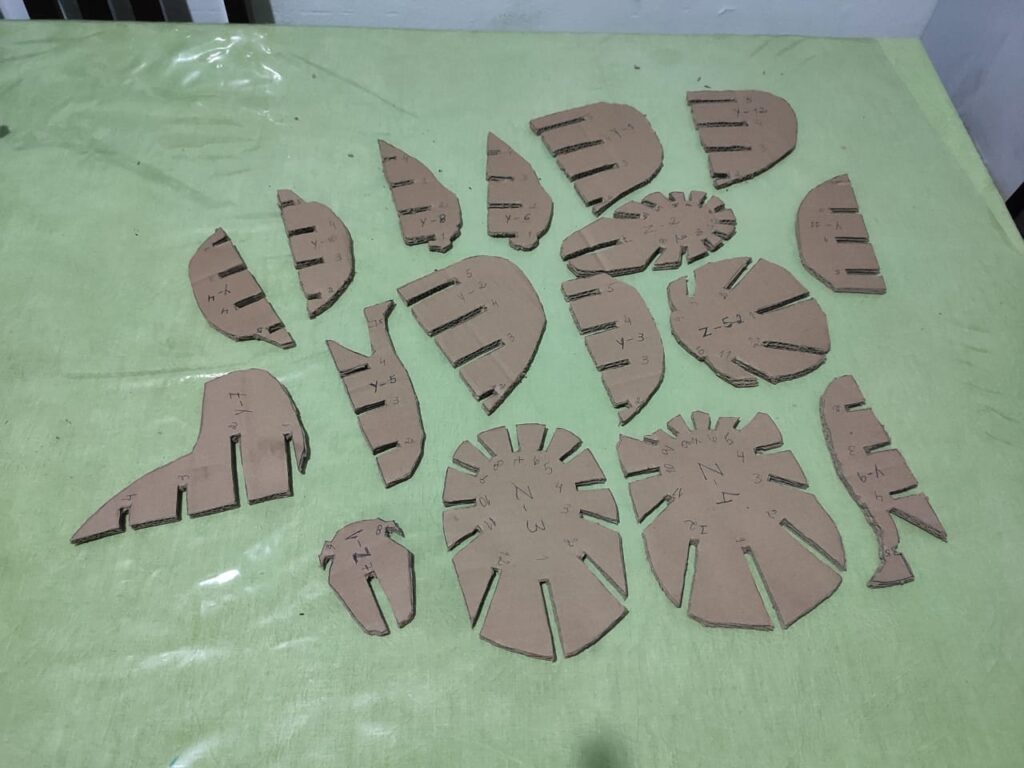
Slicer for Fusion360 is generally used with a laser cutter. I did not have one. So I simply printed the shape of the pieces into A4 paper. Then I used the prints as molds to cut the cardboard by hand. Not necessary to mention that this is the most time consuming (and patience consuming) part of the whole process. You can see the result of all the cutting bellow.
Fitting everything together
The last part is to simply put the pieces of this 3D puzzle together. I will add bellow the small animation the software generates to help you put everything in place.
Cardboard Capybara Puzzle
Any doubts? Just comment below and I will be glad to answer.

