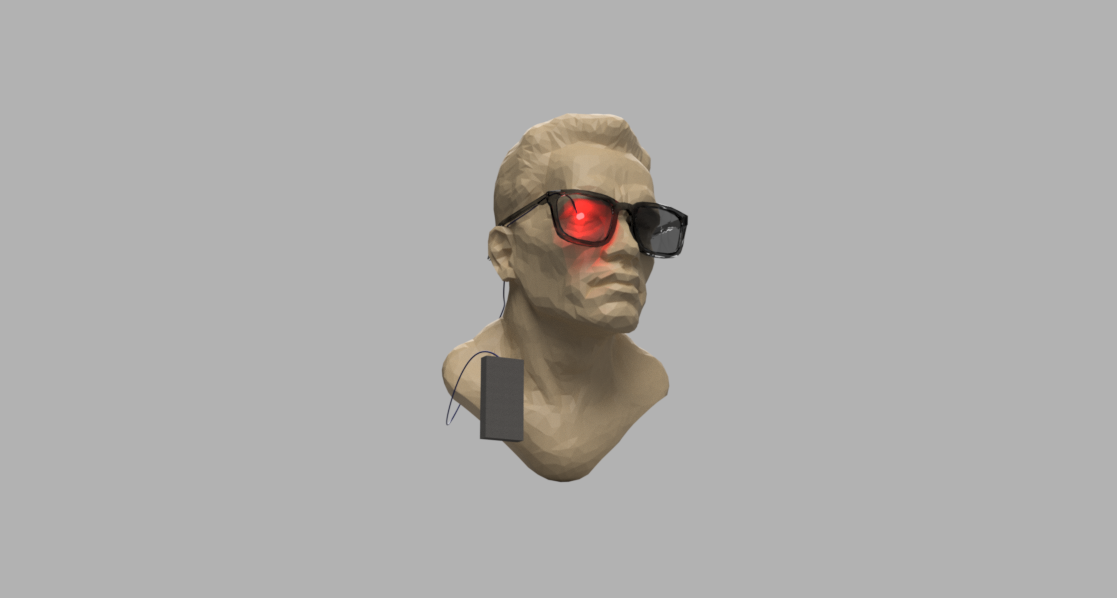
This project is a pair of sunglasses I made during Halloween to go with the rest of my terminator costume. It is a simple LED taped to a Ray-Ban Wayfarer. If you are an experienced Arduino user this project will probably bore you, but if you are looking to get acquainted with it this is your chance to do it with style.
I wanted to have sunglasses with that cool red glow of the classic Terminator movie poster. The most straightforward way of doing it was taping a red LED behind one of the lenses. I Couldn’t decide if I wanted the light to blink or not, so I added a button to control it. I also couldn’t decide the speed of the blinking, so I added a Knob to control it too.
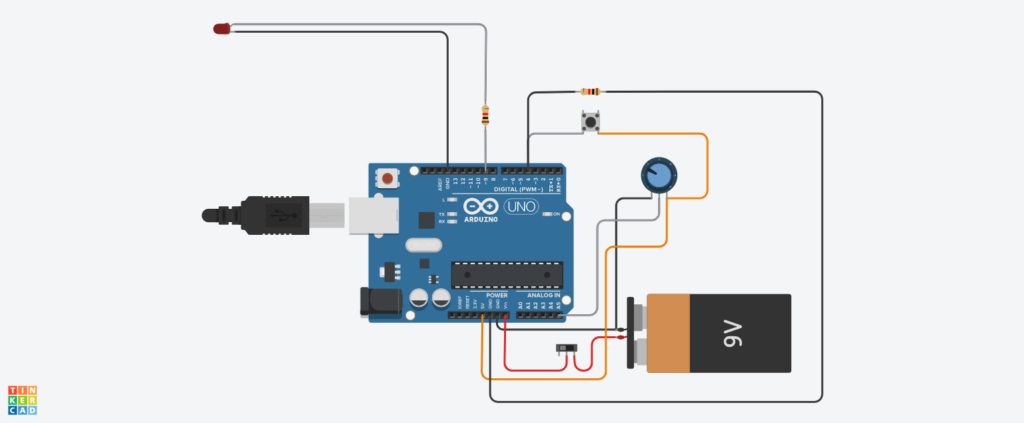
The Hardware part
Down below you will find the electronics components necessary followed by a diagram explaining how everything should be connected. More information on assembly can be found in the third part of this article.
| Component | Quantity |
| Arduino Uno R3 | 1 |
| 1K ohm Resistor | 2 |
| Red LED | 1 |
| Potentiometer | 1 |
| Push Botton | 1 |
| 9V battery | 1 |
| switch | 1 |
the programing part
The embedded code bellow is commented at an understandable level, but if you have any doubt don’t hesitate to comment asking for help.
The assembly part
After tapeing the LED behind one of the glasses’s lenses I passed the long wire connecting the LED behind my ear and into the inside pocket of my leather jacket, where all electronic components were accommodated inside a cardboard box in a way I could access the controls at its side. The final assembly working properly can be seen at the video below.